How to Add Tags
Manually
- Navigate to Settings > Tags.
- Click New Tag.

- Enter in your new tag name and click Create Tag.

If there are spaces. the spaces will be converted to dashes. - Your tag has been created! You can now tag contacts and responses with your new tag.
Automatically
You can automatically add tags to new responses or contacts when a form is filled out.
- Go to Forms and either edit an existing form, or create a new one.
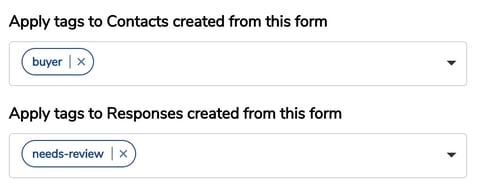
- Go to the “Settings” tab and add tags to be added to Contacts and/or Responses created from the form.
- Click “Update Form”.

How to Use Tags to Display Responses
Tags can be used to display only responses with certain tags in your display widget.
When adding or editing a widget, under Filters you'll see a field titled "Tags". Type in the tags of the responses you want to display and use the code provided to display your responses.

7 Ways to Use Tags to Display Responses
You can use tags to organize and display your responses in many different ways. Here are a few.
- Organize by product: If your company sells a wide variety of products, it's a smart idea to segment your responses by the product that is being discussed. You can then strategically place responses on each unique product page.
- Organize by service: Similar to organizing by products, if your company is service based, organizing by service is just as important. Organizing your customer responses by service will allow you to target potential customers on each individual service page with the most relevant and impactful content.
- Show different marketing channels: If your company likes to measure marketing channels regularly, using tags to automate this process is a great way to measure which avenues are most effective. For example, if you plan to collect responses on Facebook, on your website, and in person at your business, tag each accordingly to organize them.
- Collect for different events: Some companies are event based, where a lot of their business and time goes toward attending trade shows, conferences, and other business-related events. By tagging each response by event this will allow your brand to stay organized. Displaying the responses by event will also help you showcase relevant content to the right people in the future.
- Show different time frames: If your business is seasonal, or you work on different projects during different times of the year, separating responses by time frame is a great way to see trends. Tag responses by month to see which timeframe is most effective.
- Organize contest or sweepstakes submissions: If your company uses contests or sweepstakes as an incentive for customer submissions, use tags to organize those submissions. This will allow you to pick a winner from the correct pool of customers.
- Separate by office department: Most likely, your company has multiple different departments that all have a part in client communication and experience. Tagging responses by office department is a great way to separate the submissions to show off internally to your staff and externally by department on your website.