Wix is a fairly closed platform and doesn't allow a ton of integrations, but there are several ways you can use Boast and Wix together. You can always use the Boast-hosted landing page to collect feedback from your audience. It makes collecting simple to just link up to the landing page from your Wix site.
You can also embed the collection form on a Wix site.
A few conditions that Wix requires in order to embed external Javascript:
- You need an upgraded, paid Wix plan
- You need your own custom domain (e.g. https://wix.boast.io)
Once you have met these two conditions, you're ready to get started embedding the form on your Wix site.
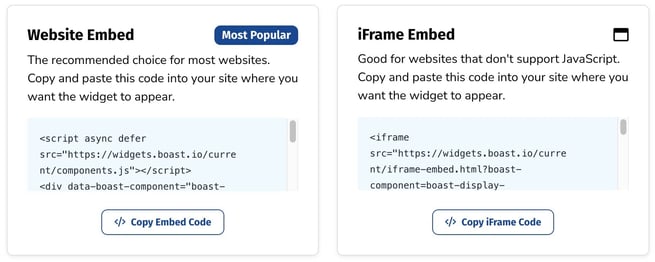
First, find your Boast embed code:
- Select Widgets or Forms from your Boast dashboard, depending on which you are looking to embed.
- Click the Share link on an existing widget or form, or create a new one.


- Copy the Website Embed (recommended) or iFrame Embed code.
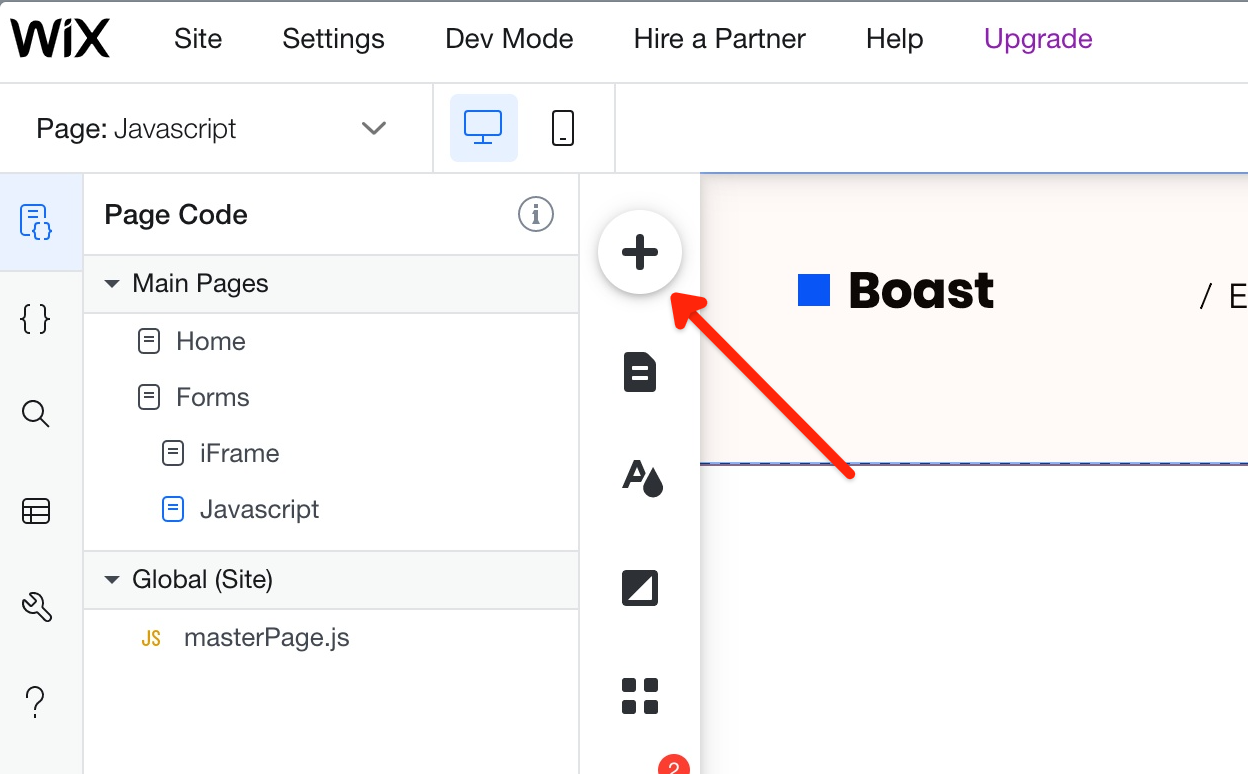
Here's how you can embed the form on your website:
- Hop into your Wix account and open your site in the Wix editor
- Click the "Add" button to add a new element to the page
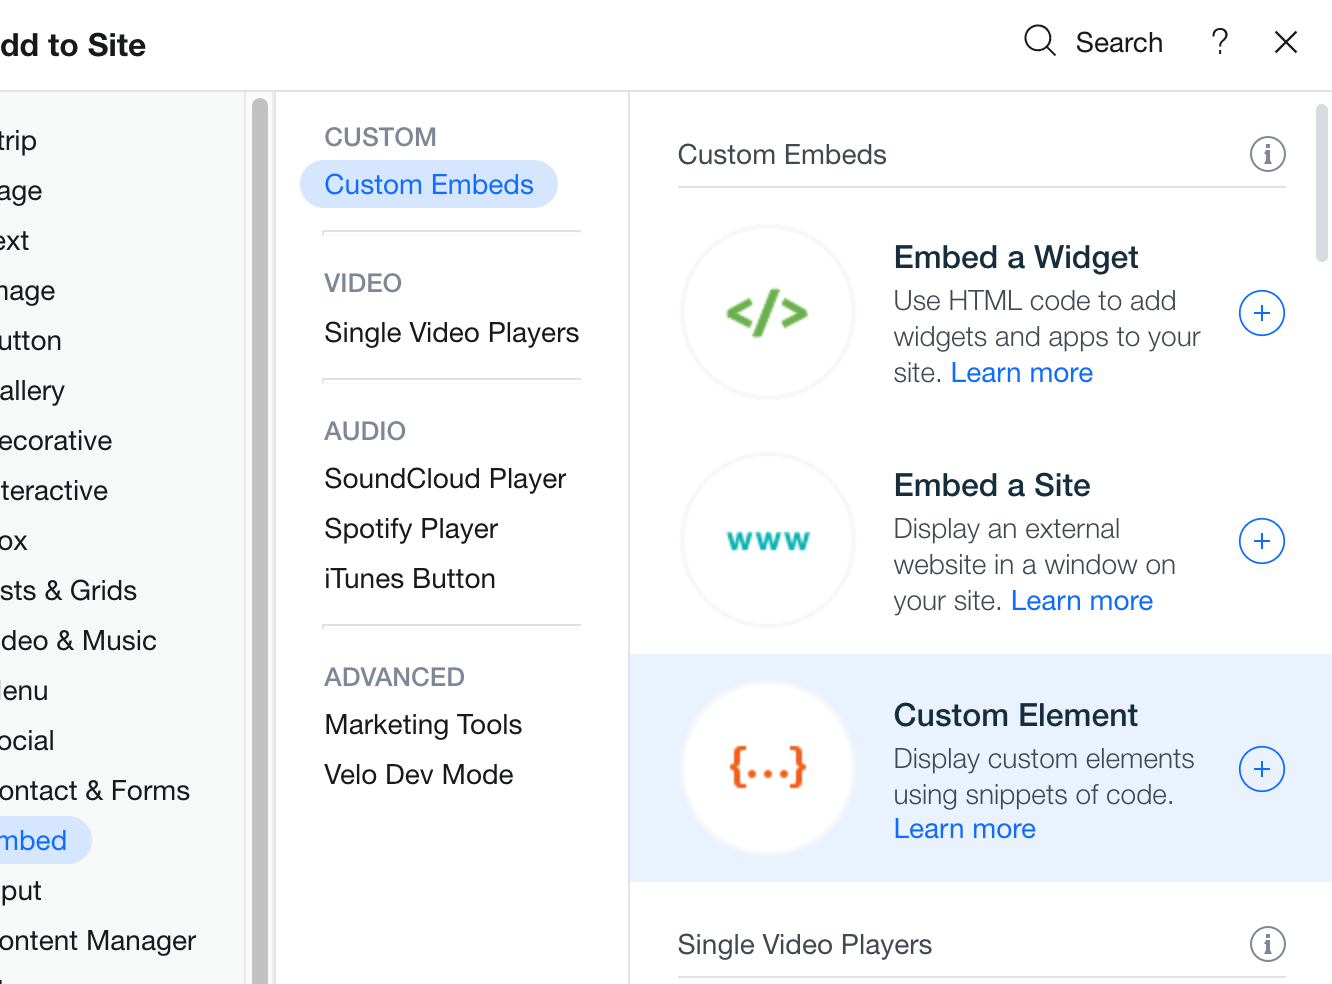
- Click "Search"
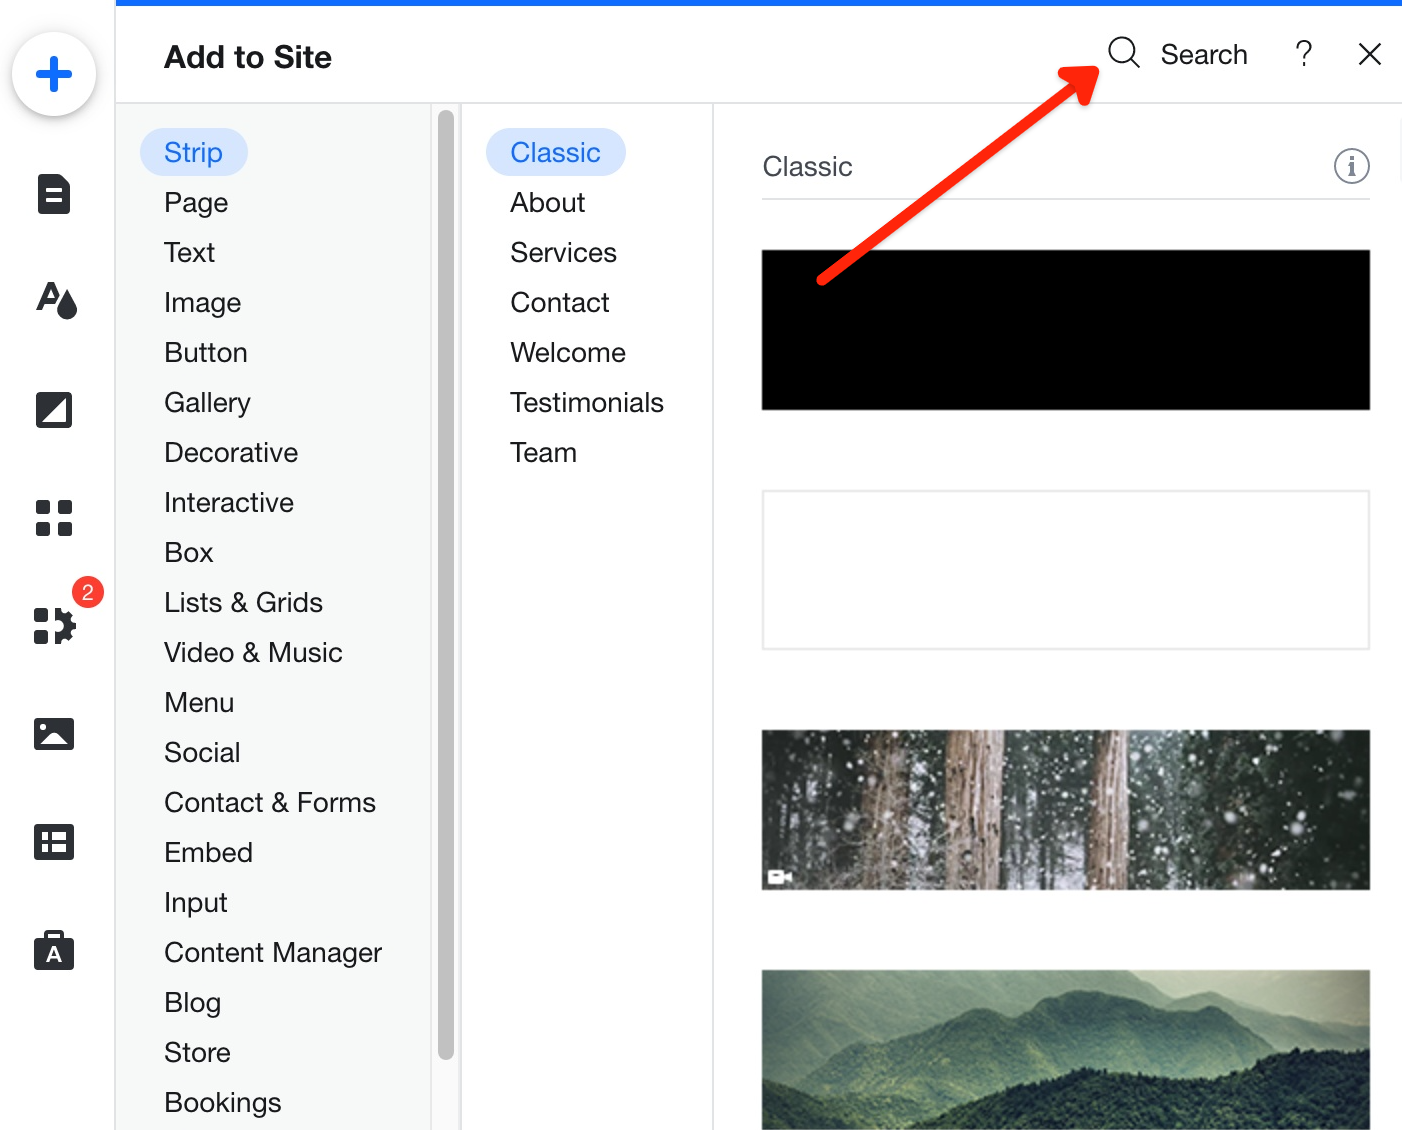
- Search for "Embed" and click the "Embeds" option underneath "Add to Site"
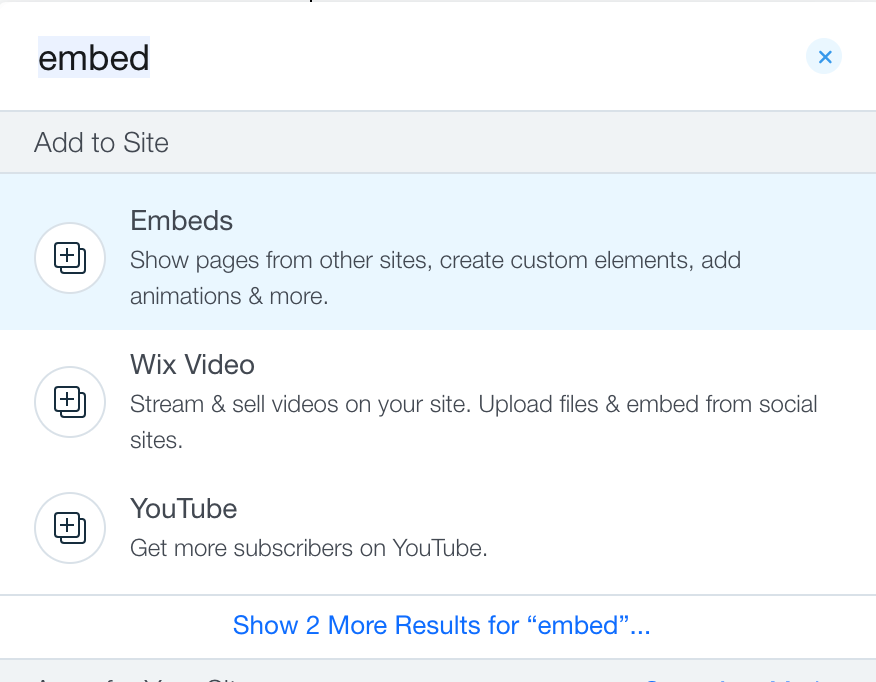
- Click "Custom Element"
- A new Custom Element will be placed on the page
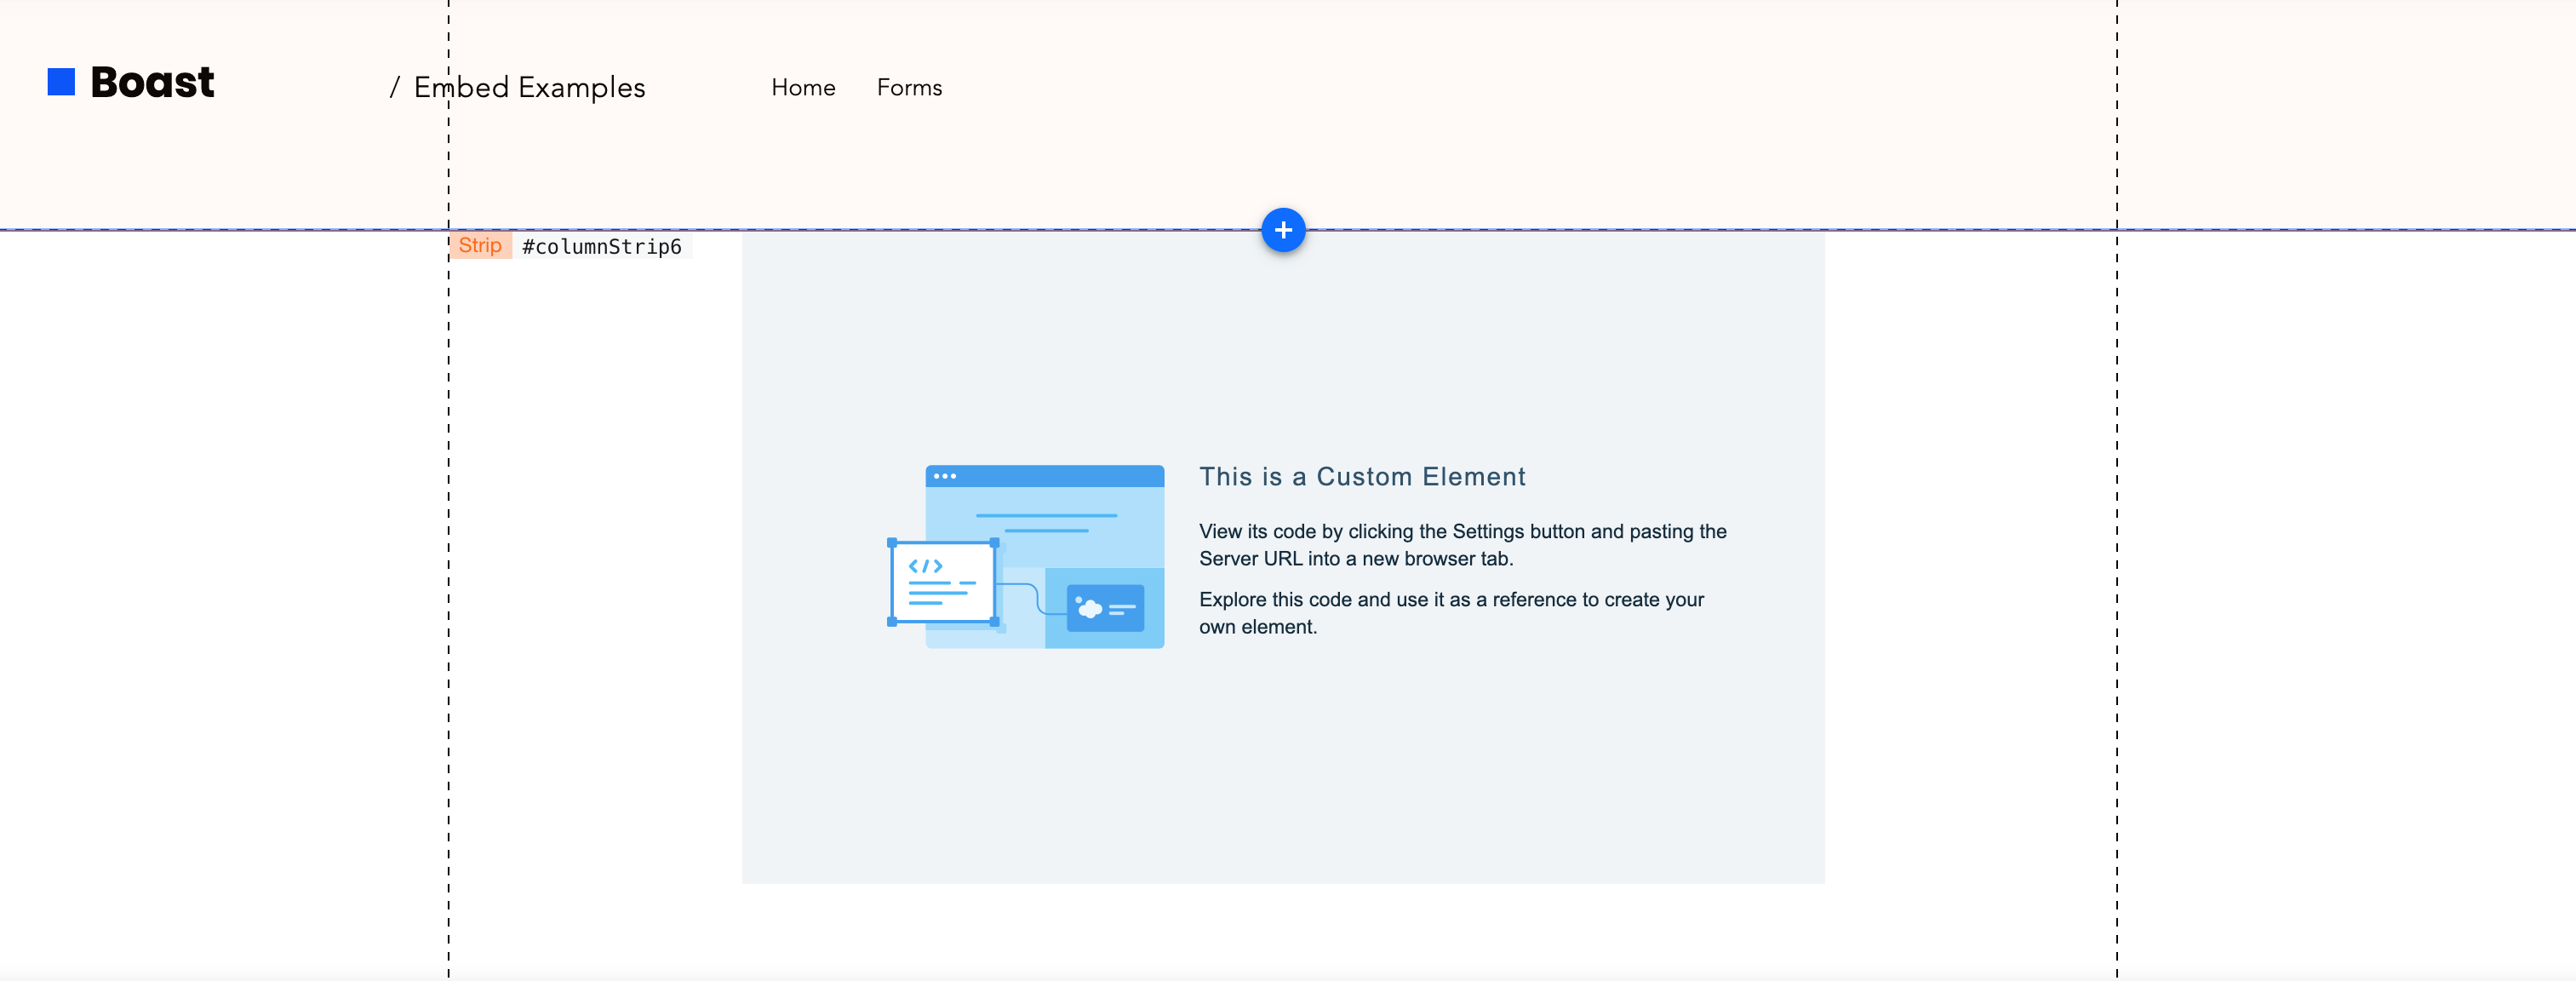
- Click the new Custom Element and select "Choose Source"

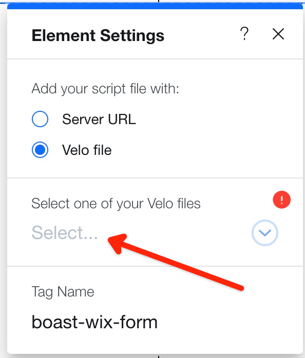
- In Element Settings, select "Velo file"
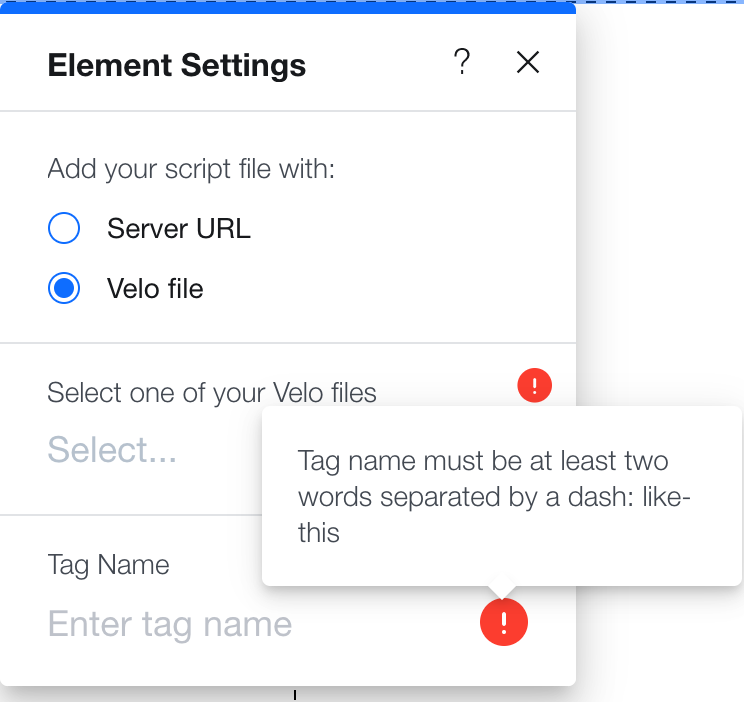
- Enter the Tag Name of "boast-wix-form"
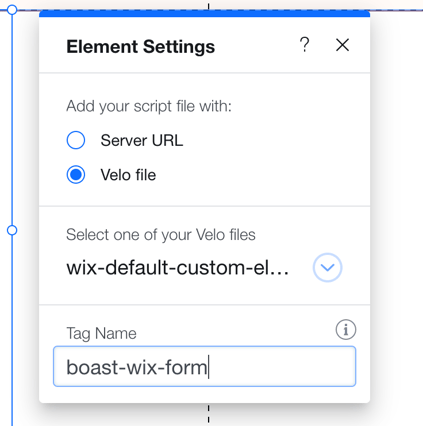
- Hit the "Select..." and then "Create New"
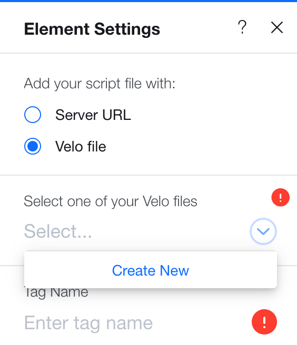
- Paste in the following code into the new file that's been created:
const FORM_ID = 'YOUR_FORM_ID_HERE';
const BOAST_COMPONENT = 'boast-form';
const CLASS_NAME = 'font_8';

const createBoastComponent = () => {

const divContainer = document.createElement('div');

divContainer.setAttribute("data-boast-component", BOAST_COMPONENT);

divContainer.setAttribute("data-form-id", FORM_ID);

return divContainer;

};

const createScript = () => {

const scriptElement = document.createElement('script');

scriptElement.src = "https://widgets.boast.io/current/components.js";

scriptElement.defer = true;

scriptElement.async = true;

return scriptElement;

}

const createContainer = () => {

const divElement = document.createElement('div');

divElement.className = CLASS_NAME;

return divElement;

}

class BoastCustomWixWidget extends HTMLElement {

constructor() {

super();

}

connectedCallback() {

let divContainer = createContainer();

divContainer.appendChild(createScript());

divContainer.appendChild(createBoastComponent());

console.log(divContainer);

this.appendChild(divContainer);

}

}

customElements.define('boast-wix-form', BoastCustomWixWidget);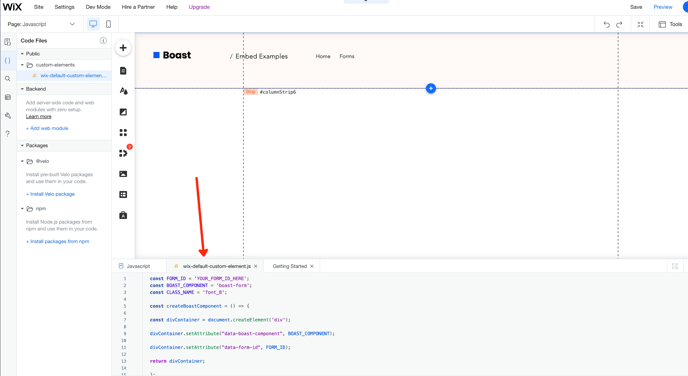
- Log into your Boast account and click "Forms" in the top menu
- Click the "Share" link underneath the form you'd like to embed
- Under "Embed On Your Website", you'll want to find your form ID in the Javascript code (inside the quotations of the 'data-form-id' attribute.
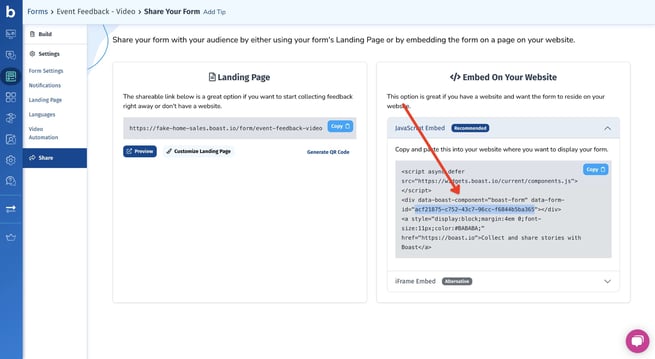
- Hop back into the script in Wix and paste the form ID into the Javascript code where it says YOUR_FORM_ID_HERE. Your form ID is the "data-form-id" attribute in the Javascript embed script
- Publish your site!
Here's a working example of the form embedded on a Wix website: https://wix.boast.io/forms-javascript
Here's an example of what the code should look like once you have added your form ID:
const FORM_ID = 'ebac7f2b-f29c-4cd2-aee3-d97d226b6a27';

const BOAST_COMPONENT = 'boast-form';

const CLASS_NAME = 'font_8';

const createBoastComponent = () => {

const divContainer = document.createElement('div');

divContainer.setAttribute("data-boast-component", BOAST_COMPONENT);

divContainer.setAttribute("data-form-id", FORM_ID);

return divContainer;

};

const createScript = () => {

const scriptElement = document.createElement('script');

scriptElement.src = "https://widgets.boast.io/current/components.js";

scriptElement.defer = true;

scriptElement.async = true;

return scriptElement;

}

const createContainer = () => {

const divElement = document.createElement('div');

divElement.className = CLASS_NAME;

return divElement;

}

class BoastCustomWixWidget extends HTMLElement {

constructor() {

super();

}

connectedCallback() {

let divContainer = createContainer();

divContainer.appendChild(createScript());

divContainer.appendChild(createBoastComponent());

console.log(divContainer);

this.appendChild(divContainer);

}

}

customElements.define('boast-wix-form', BoastCustomWixWidget);
If you'd like to change the font size, you can update the CLASS_NAME variable to be something different than 'font_8', here's a list of Wix-supported classes you can use: https://devforum.wix.com/kb/en/article/wix-style-parameters#font-values